I accidentally deleted important files on my Mac and already emptied the Trash before realizing I still needed them. Some were work documents and family photos, so I’m trying to find the safest first steps to recover deleted files on a Mac without making things worse. I’d really appreciate advice on what to try first.
I’ve been there. You clear the Trash, then a minute later your stomach drops because the file you needed was sitting in it. It feels final, but sometimes it isn’t. What matters most is what you do right after you notice.
First thing I’d do, stop using the Mac. Seriously. Don’t install stuff. Don’t pull down updates. Don’t copy a bunch of files around. Don’t keep poking at it more than needed. When macOS deletes a file, it often marks the storage space as free before the old data gets replaced. If you keep using the machine, you raise the odds of overwriting what you want back.
Before touching recovery tools, I’d check the boring stuff:
- Search in Finder by filename, file type, or rough date.
- Open Trash again and look slowly.
- Hit Command + Shift + . to show hidden files.
- Go back to the folder where the file used to be.
- Check iCloud and the Recently Deleted area on https://www.icloud.com.
If that gets you nowhere, backups are next. If you’ve got Time Machine running, open the folder where the file lived, enter Time Machine, jump back to a point before deletion, and restore it. In my experience, this is the least messy option. You get the original file back, name and all, without doing forensic gymnastics.
One thing people miss on newer Macs is APFS snapshots. macOS often creates local snapshots before updates or system changes. Open Disk Utility, pick your APFS Data volume, and see if snapshots exist from before the file vanished. If you find one, you might be able to mount it and copy the file out by hand. It’s not flashy, but I’ve seen it work when people thought they were done.
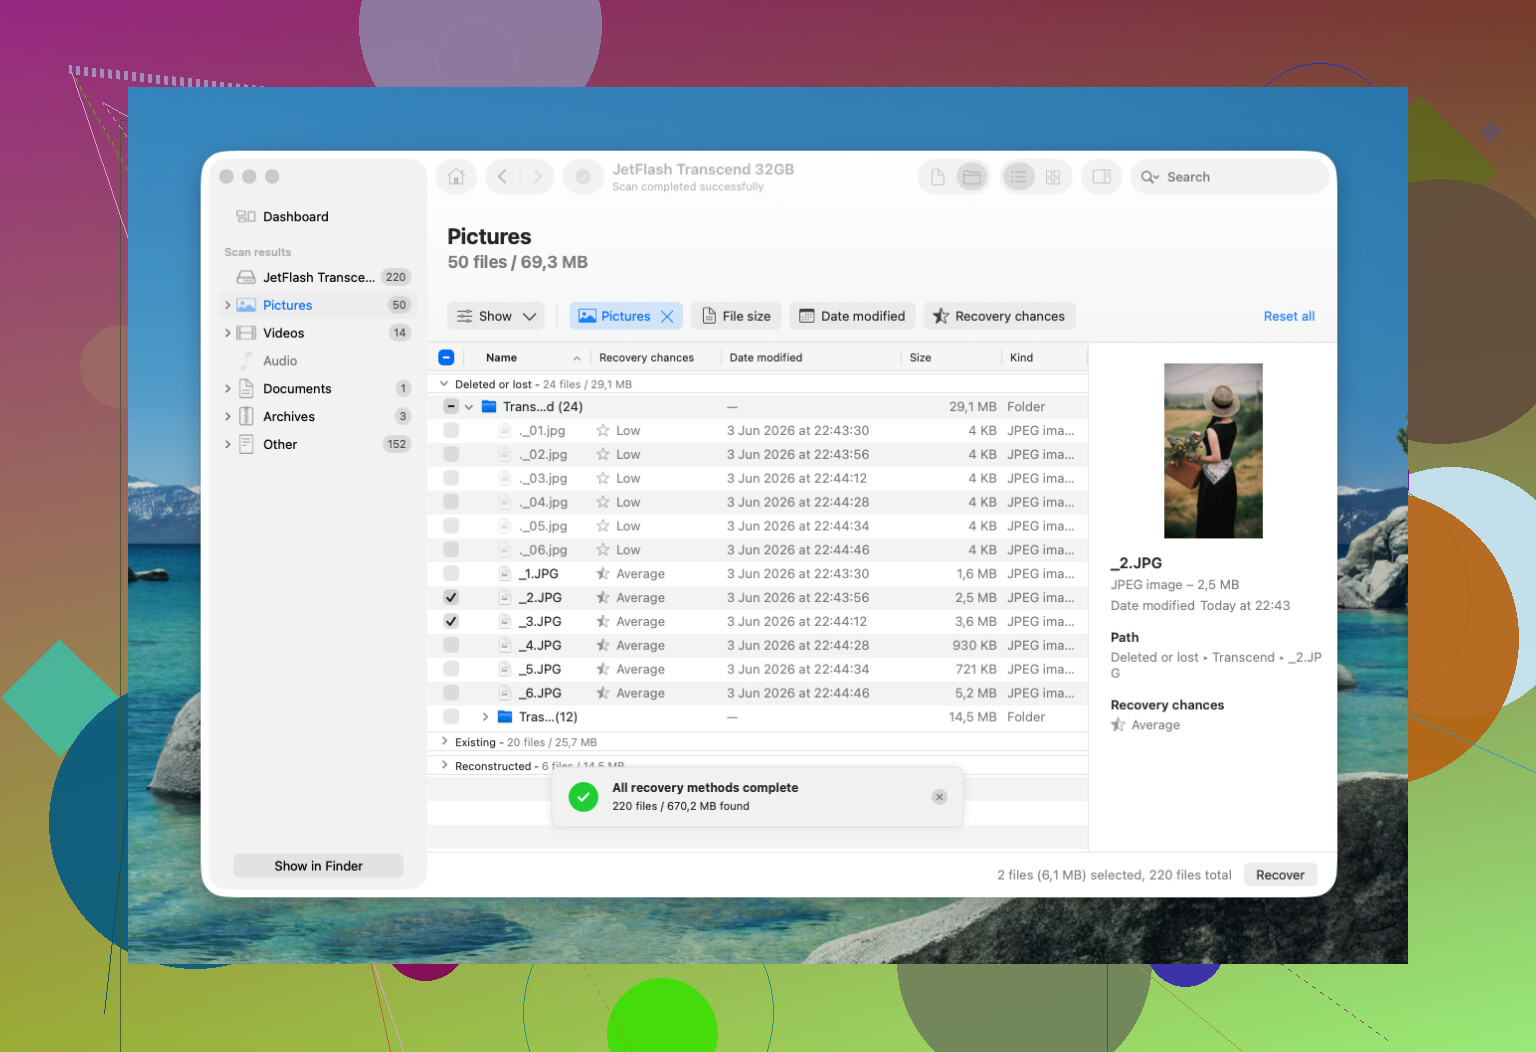
If backups fail, then I’d move to recovery software. Disk Drill is one a lot of people start with because the workflow is simple and it runs fine on current macOS versions. The usual steps look like this:
- Install it on an external drive if you’ve got one.
- Select the drive where the deletion happened.
- Run the scan.
- Sort through the results.
- Preview what looks right.
- Recover files to a different drive, not back onto the same one.
Small warning from hard-won experience, modern Macs with SSDs are rougher for recovery than old spinning drives. TRIM is part of the reason. It helps SSD performance by cleaning up deleted blocks, which is nice for speed and bad for file recovery. On an old hard drive, deleted data might hang around for days. On a newer MacBook SSD, your window might be short. Annoying, but true.
I’d stop doing DIY stuff and look at a recovery lab if any of this is happening:
- The Mac got wet or took a physical hit.
- The SSD doesn’t show up right.
- The drive keeps disconnecting, freezing, or throws read errors.
- Recovery software can’t read the drive.
- The files matter enough where you don’t want to risk one more mistake.
If it were my Mac, I’d go in this order. Finder. Trash. iCloud. Time Machine. APFS snapshots. Then a recovery scan right away. Speed matters here. A lot of recoveries work out because someone stopped using the machine fast enough. I learned that the hard way once, and yeah, I dont ignore it now.
1 Like
Empty Trash is bad, but I would check one place people skip. App-specific recovery.
If the work docs were from Pages, Word, Excel, Photoshop, Preview, or similar apps, open the app first. Look at File, Open Recent, AutoRecovery, or temp files. Office often keeps AutoRecovery copies in your user Library. Pages and Numbers sometimes keep version data if the file lived in iCloud Drive. Photos are the same story. The Photos app has its own Recently Deleted album for 30 days, separate from Finder behavior.
I slightly disagree with @mikeappsreviewer on one point. Hidden files and Finder search are fine, but after Trash is emptied, time spent clicking around your Mac keeps writing logs, caches, and sync data. I’d keep checks short and targeted.
Also check cloud services beyond iCloud. Dropbox has Deleted Files. OneDrive has Recycle Bin. Google Drive has Trash plus version history for docs. For work files, your company MDM or backup tool might keep endpoint snapshots. A lot of ppl forget IT already has a backup.
If you move to software, Disk Drill is a solid first scan because preview support is decent and it handles common Mac file systems well. Install it on an external drive, scan the internal drive, then recover to external storage. If you want a quick visual on recovering deleted files on a Mac, that link is worth a look.
For search terms, look for Mac data recovery software for deleted files, Mac photo recovery, and document recovery for APFS. If FileVault is on and the SSD already trimmed blocks, recovery odds drop fast. If these are irreplaceable family photos, stop DIY after one scan and send it in. One bad write is enough to make things worse.

I’m mostly with @mikeappsreviewer and @jeff on stopping use ASAP, but I’d add one thing they didn’t really stress: figure out where the files originally lived before you do anything else. That changes the recovery path a lot.
If the family photos were ever inside the Photos app library, don’t just search Finder. Open Photos and check the library package status, shared library, and synced devices tied to the same Apple ID. If the work docs came from Desktop/Documents synced by iCloud, sometimes another Mac still has a local copy even after deletion propagated weirdly. Same idea for an old email attachment sitting in Mail.
Also, check file versions, not just deleted copies. On Mac, some apps support “Browse All Versions” from the File menu. People forget this and go straight into recovery mode.
One mild disagreement: I would not spend too long hunting APFS snapshots manually unless you’re comfy with disk stuff. Easy to mess around and waste time tbh.
If you do software recovery, Disk Drill is a reasonable first pass because it can preview recoverable docs and photos before restoring. Just don’t install it onto the same internal drive if you can avoid it. Recover to an external disk only.
For a fast visual walkthrough, this Mac deleted file recovery video is pretty clear.
If the files are truly irreplaceable, do one careful scan max, then stop. Thats the part ppl ignore.
One extra angle I’d add beyond what @jeff, @vrijheidsvogel, and @mikeappsreviewer covered: check other devices that were offline when the deletion happened.
If the files were in iCloud Drive, Dropbox, or OneDrive, an older Mac, iPad Files app cache, or even an iPhone app may still hold a local copy that hasn’t synced cleanly yet. Put those devices in airplane mode before opening anything if you want to avoid a fresh sync wiping the last copy. Same trick can help with Notes attachments and PDF editors.
I slightly disagree with the “search around first” advice if this is a modern internal SSD. On current Macs, every extra write hurts your odds. I’d keep the Mac mostly idle and do checks only where a separate app/database may still have its own copy.
If you go the software route, Disk Drill is a sensible first pass.
Pros
- easy preview for photos/docs
- supports APFS well enough for consumer recovery
- simple interface, less chance of restoring the wrong stuff
Cons
- not magic against TRIM/FileVault realities
- deep scans can return lots of junk filenames
- paid recovery if you actually need to restore beyond scanning
One thing I’d do before scanning: make a full byte-for-byte image of the drive, then scan the image, not the live disk, if you have the gear and know-how. That gives you one stable snapshot to work from.
If the deleted files were tax records, legal docs, or one-of-a-kind family photos, don’t keep trying five tools in a row. Try one careful pass, maybe with Disk Drill, then stop and escalate.