My hard drive still shows up on my computer, but I can’t open my files and I’m worried the drive is failing. This happened after it started freezing and making strange noises, and now I need help figuring out the safest way to recover important photos and work documents without making things worse. Looking for advice on hard drive data recovery steps and whether I should try software or get professional help.
If this happened to you, first thing I’d do is stop writing anything to the drive. No downloads, no installs, no moving files around, no saving recovery results back onto it. I’ve seen people make the mess worse by treating the disk like normal after the loss. Once old data gets overwritten, your odds drop fast.
Before running recovery tools, check whether the drive is sick in a hardware sense.
If you hear clicking, grinding, beeping, or the drive keeps dropping off and reconnecting, stop there. Same deal if it only appears once in a while or takes forever to show up. I would not keep scanning a drive like that. Repeated reads can push a failing disk further. At that point, a recovery lab is the safer route.
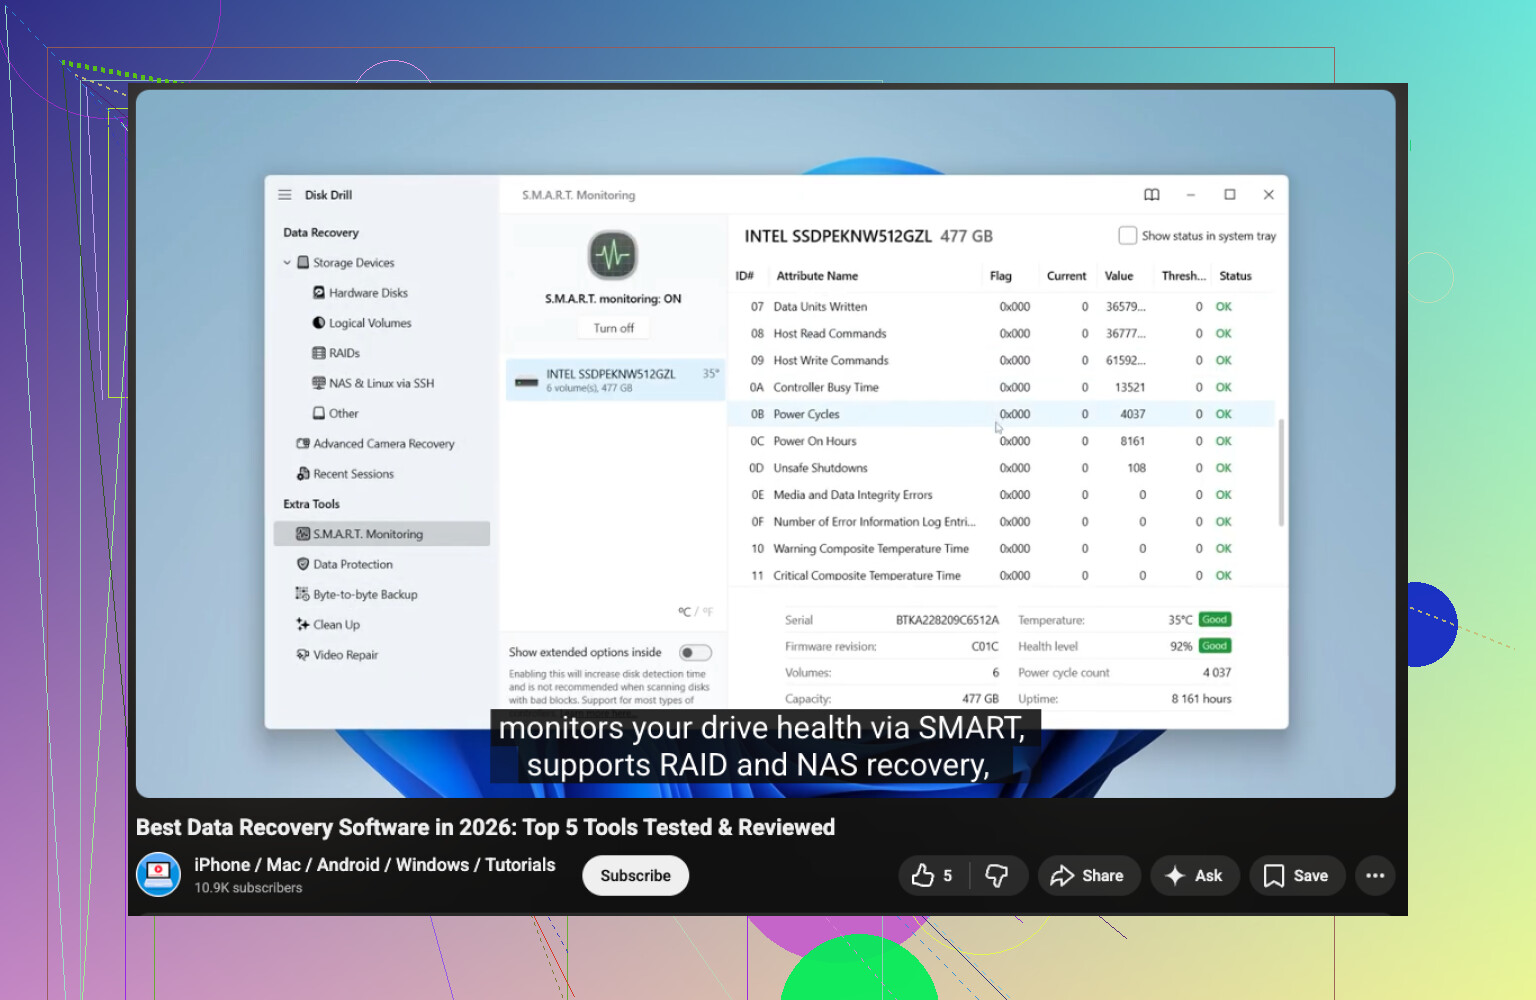
If the drive shows up normally, look at its S.M.A.R.T. health first. I’d use CrystalDiskInfo or the S.M.A.R.T. check inside Disk Drill. If you see warnings, rising bad sectors, or poor health, copy the important stuff first and keep extra stress to a minimum.
For software recovery, I’d start with Disk Drill. I used it on a formatted external once, and the layout was easier to deal with than some of the older tools. It’s decent for deleted files, damaged partitions, and messed up file systems.
What I’d do:
- Install Disk Drill onto a different drive.
- Plug in the problem drive.
- Launch Disk Drill and pick the affected disk.
- Hit Search for lost data.
- Let the scan run all the way. Stopping early cost me files once.
- Use the search and filters to narrow things down.
- Preview files before pulling them back.
- Recover the important ones first.
- Save recovered files to another HDD, SSD, or USB drive. Do not write them back to the same disk.
Also, check the easy stuff before you hammer the drive with scans. I’d look in Recycle Bin, File History, OneDrive, Time Machine, and any external backup you forgot you had. More than once, the file I thought was gone was sitting in cloud sync the whole tiem.
If Disk Drill misses what you need, I’d try Windows File Recovery, Data Rescue, or AnyRecover next. If the drive shows physical failure signs, I’d stop the DIY route there. That’s where pro recovery starts making more sense.
1 Like
If the drive started freezing and making noises, I would treat this like a failing drive first, file recovery second.
I agree with @mikeappsreviewer on one big point. Stop using it. Where I differ is this. I would not spend much time scanning the original disk if it clicks or disappears. Reads add stress. The safer move is to make a sector-by-sector image first, then work from the image. On Linux, ddrescue is the tool people reach for because it skips bad areas and returns later. It often pulls more data off weak drives than a normal file scan.
My order would be:
- Connect the drive by SATA if possible. USB bridges sometiems hide errors.
- Check if BIOS sees the full capacity.
- If the size is wrong, or the drive drops out, stop DIY.
- If it stays online, clone it to a healthy drive with equal or larger size.
- Run recovery tools on the clone, not the original.
After you have a clone, try Disk Drill on the clone image or copied disk. It is one of the easier options for damaged file systems and missing partitions. If file names are gone, PhotoRec is ugly but strong for raw recovery. Recuva is fine for simple deletions, not for sick drives.
Do not run CHKDSK first. People do this and lose folder structure fast. CHKDSK repairs the file system, not your missing files.
If you want a quick walkthrough, this video is decent for hard drive recovery basics: watch this hard drive recovery guide.
If you’re comparing tools, look for data recovery software for hard drives with preview, partition recovery, and S.M.A.R.T. checks. If the noise is grinding or repeated clicking, skip software and send it to a lab. That is the part where DIY often goes bad fast.
If it was freezing and making noises before the files stopped opening, I’d be a little more cautious than just jumping into recovery software. I agree with @mikeappsreviewer and partly with @viajeroceleste, but I don’t think every detected drive needs an immediate full DIY marathon. Sometimes the smartest move is figuring out what kind of failure you’re dealing with first.
A few things I’d check before doing anything heavy:
- Try a different cable, port, or enclosure if it’s an external drive.
- See if folders show weird names, 0-byte files, or “parameter is incorrect” errors.
- Check whether the partition still has the correct file system and size in Disk Management.
- If it’s an HDD, put your ear near it for a minute. Rhythmic clicking is bad news. So is spin-up, spin-down behavior.
One thing I’d avoid is repeatedly trying to open damaged files in Explorer. Windows can hang and keep poking the drive over and over. That’s not helping.
Also, I slightly disagree with the “copy the important stuff first” advice if the drive is actively making nasty noises. In that case, picking through files manually can be worse than doing one controlled pass with imaging or handing it off to a lab. People panic, start opening random folders, and the disk just keeps getitng hammered.
If the drive is stable enough to stay mounted, Disk Drill is fine for checking what’s recoverable, especially if the file system is damaged and not just simple deletion. I’d still use it carefully and only from another healthy drive. Their interface is easier than a lot of old-school recovery stuff. If you want a solid user discussion, this Disk Drill review and recovery software breakdown is worth reading too.
Big thing: if the data is truly important, set yourself a limit. If the drive gets louder, slower, or disconnects during reads, stop messing with it. That’s usualy the point where DIY goes from “maybe” to “you just made the lab bill worse.”
I’m with @viajeroceleste on one thing: strange noises change the whole playbook. But I slightly disagree with the “always image first” crowd if the drive is still readable and the data is not lab-level valuable. Sometimes a weak drive dies during a long full-clone attempt, and a short targeted recovery of the most critical folders can be the smarter gamble.
What I’d add:
- Check Event Viewer for disk I/O errors. If Windows is logging tons of bad block/reset errors, stop experimenting.
- Feel the drive temperature. Overheating externals in cheap enclosures can act “dead” when the disk itself is still okay.
- If it’s an external HDD, remove it from the USB enclosure only if you know what you’re doing. A bad bridge board can mimic drive failure.
- Never let Windows “fix” it automatically.
On software, Disk Drill is fine once you’ve decided the drive is stable enough to read.
Pros for Disk Drill:
- easy preview
- good at damaged partitions and filesystem issues
- less confusing than a lot of recovery tools
Cons:
- not magic on physically failing drives
- deep scans can be slow
- raw recovery may lose original names/folders
Compared with the approaches mentioned by @mikeappsreviewer and @viajantedoceu, I’d say the real decision is not “which app,” it’s “is this hardware failure or logical damage?” If the noise is clicking or scraping, skip DIY. If it’s just detected but unreadable, recover to another drive only.